20 Oct 2014

LIPSTICK TREND OF 2014: ORANGE LIP COLOUR


Hello Beauties! I hope y’all are having a fabulous day so far.

Every fashion/beauty year brings about it new revolutions in the industry that generates a rave for the moment it lasts. This beauty year has brought in quite some changes that we can’t forget in a hurry.

Orange lip colour is so in this year. This colour is gorgeous and nothing screams beautiful like having various shades to choose from. Shades of orange lipstick available are orange, coral, and tangerine. For me, orange is the new nude! While red can be your classic and nude your friend, orange can be both these things and more! Orange lips works irrespective of your skin colour depending on the shade of orange you choose.


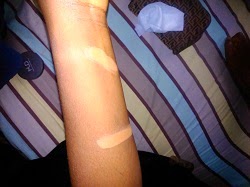
There are various brands of orange lip sticks available various skin shade and you can be sure to find one that works for your skin shade. I own the Wet and Wild Megalast lipstick in Carrot gold and it works well for me. If you are unsure whether or not the orange lip colour will look good on you, then you should go for MAC Morange! From swatches and reviews I have seen, it obviously works well for many skin tone.


 MAC-Morange

WET N WILD – Carrot gold 


L’OREAL- Orange power


TARA-Neon Orange


ZARON-Mystic


MAYBELLINE- Electric Orange

The orange lip colour was proudly worn by models at various international fashion shows including New York2014 Fashion week and the  2014 London fashion week 2014.
I urge you to step out of your comfort zone and try the orange lip colour.Go on, be trendy, try the orange lip colour for a change today!

Have a fulfilled day ahead.
Which orange lip colour do you own?
 
Stay Beautiful,
Junie
 

13 Oct 2014

IT'S MONDAY!


Good morning Beautiful people. 

It’s Monday and the start of a new week! Please make the best out of your day because you are the creator of your own destiny and you definitely want the best for yourself!

Plan ahead for the week and remember to set realistic target and goals for yourself.


Have a good day ahead people.

Stay Beautiful,
Junie

9 Oct 2014

DIY: HOW TO MAKE YOUR OWN EXFOLIATING SCRUB


Hello Beautiful people!

I am still working on putting a tag on my regular features on the blog, but until that is completed..hey, its a DIY post! Everyone including me loves a DIY post and the fact that its a homemade recipe makes it interesting all the more! Now let's get straight into the post. How to make your own home made exfoliating scrub!

I will start with explaining what exfoliation is and its benefits.


What is Exfoliation:
Exfoliation is the removal of dead skin cells on the surface of the skin.

What are the Benefits of Exfoliating the skin:
Exfoliating the skin has great benefits and the obvious one i appreciate is the soft feel i get after exfoliating and the way I can literally feel my pores are open enough to breathe...its funny but true.

Other benefits;
  • It refreshes the skin making it soft and radiant 
  • Regular exfoliation unclogs the pores thus controlling acne and blackheads
  • Dead cells removal helps even skin tone over time
  • Exfoliation speeds up the skin renewal process
  • Routine exfoliation reduces the appearance of wrinkles and produces a more younger and healthy looking skin.

If you are reading this post and have oily and sensitive skin like me, then you must have learnt the hard way how to read product labels before purchasing any skin care product. I am constantly checking for the drug information of any skin care product I intend to use especially facial products. I react to the tiniest and oddest of things, even cotton wool!

I learnt to make my own scrub after I reacted to a popular exfoliating scrub for reasons unknown to me.  I appreciate making my own exfoliating scrub because I feel safer knowing they are simple household recipe that can't harm me.

RECIPE:
                                     

OLIVE OIL


GRANULATED SUGAR
1 heaped tablepoon of granulated sugar/ salt (I prefer sugar because salt is a bit more abrasive on my skin)
2 tablespoonful of olive oil
Step 1:


Pour the sugar into a clean container with a good cover that you can store it.
Step 2:


Pour the olive oil on the sugar and let the sugar soak the oil up. Make sure the oil covers the sugar as the oil provides a gliding surface that makes exfoliation less painful and moisturise the skin as well.

Step 3:


Viola! Your exfoliating scrub is ready for use!

This can be used three times a week to exfoliate dead cells. If you have a recent bout of acne breakout then I would advise you avoid using an exfoliating scrub as this can further irritate the skin rather than restore it.


Do you know any other homemade recipe for preparing an exfoliating scrub? Please share!

I hope you found this post helpful.

Have a blessed day ahead.

Stay Beautiful,

Junie

7 Oct 2014

FOUNDATION PRINCIPLE: HOW TO CHOOSE THE RIGHT FOUNDATION SHADE


Hey Beautiful people! Welcome to my blog.

I will be starting with a topic that people don’t like to talk about because it is dicey. It’s the foundation principle. Just like it implies, a good foundation is the basis of a flawless makeup finish. When properly applied, this enhances your natural beauty and rather than mask it.


There are various types of foundation blunders and the most being the case of choosing a shade lighter than your skin tone. This is common because women tend to think that they are lighter than they actually are and most shop assistants do not know how to test for the right shade.


FOUNDATION GONE WRONG
.


Except you are going for an Avant-garde photoshoot, no one should step out like these ladies, I mean no one!


I once went in for a quick fix makeover and the client asked me why I chose a foundation that was her skin colour, according to her, a makeup artist told her to always use a lighter shade of foundation to make her face look ‘brighter’. I was stunned! She wasn’t talking about Contouring and Highlighting, so you should understand my shock.

TEST FOR FOUNDATION


This is a popular way shop assistants test for your shade of foundation, but it is wrong. The face is constantly exposed to elements of weather than any other part of the body, so the hand is a wrong place to test for the right shade of foundation.


The side of your cheek right part of the face to test for your shade of foundation. This can be done with the index finger or a makeup sponge.This part of the face gives the true shade of a person’s skin. 

The right shade of foundation when applied on the side of the cheek, blends perfectly into the skin.


You would notice that the color on my face blends well with my neck. 


There are no harsh lines, it’s perfectly blended.This gives off a more natural looking flawless finish!


Final Look!


I hope you found this post helpful!

Stay Beautiful,
Junie